
Sign up for any vinyasa yoga class, and you'll probably come face-to-face with wheel pose—the asana is known as the *queen* of all heart openers. It's also rather intimidating as far as inversions go. "It's scary to go upside down," concedes Sarrah Strimel, a 650-hour certified yoga teacher and creator of the Damn Good Yoga class at Project By Equinox in New York City. "Inversions put our heart above our head, and this one is especially precarious because your head is literally dangling above the ground."
When you get over the fear-factor of Urdhva Dhanurasa (as it's technically called), however, you'll discover that it packs major benefits for both your body and mind.
Exposing your chest in any major backbend stimulates your pituitary and thyroid glands, which can counteract the effects of stress and anxiety, according to Strimel. Plus, sustaining yourself upside down strengthens your arms, stretches your shoulders, and tones your legs, glutes, and abs. On an energetic level, wheel pose cracks open your Anahata—AKA heart chakra, meaning: "[The pose] brings up old, stuck hurt from your past as you're bringing your back body toward your front," says Strimel. "Often times, I feel residual effects hours later from a backbend practice."
Below, Strimel explains how to execute this heart opener of all heart openers—safely.
How to lift into wheel pose
"Never attempt this pose without having done a proper warm-up, including joint work, shoulder work, hip openers, and milder backbends," advises Strimel. Once your body's prepped and ready to go upside down, she recommends repeating this pose three times or more. To modify your wheel, Strimel recommends placing a set of blocks shoulder-width apart (on the lowest setting) against a wall and placing your hands on top of them to give you an extra boost.
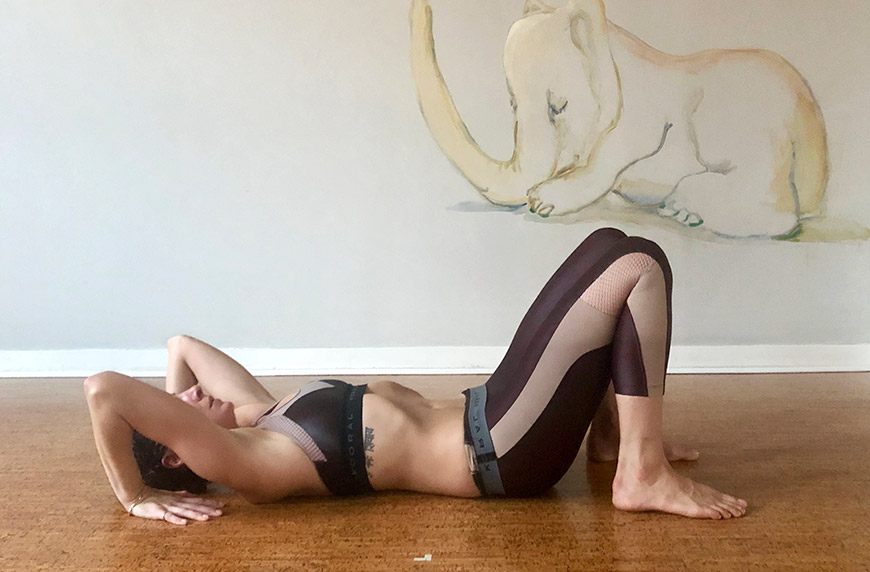
Step 1
Start by lying down on your back, knees bent, with your feet roughly hip-width apart and about arm's length away from your shoulders. Place your hands above your head, roughly shoulder-width apart, palms facing down to the floor and your fingers facing you.
Energetically squeeze your elbows and arms into the midline of the body. Do the same with an inner rotation of the thighs, as though you're holding a block between them. (Or, put a real block between them, suggests Strimel.)
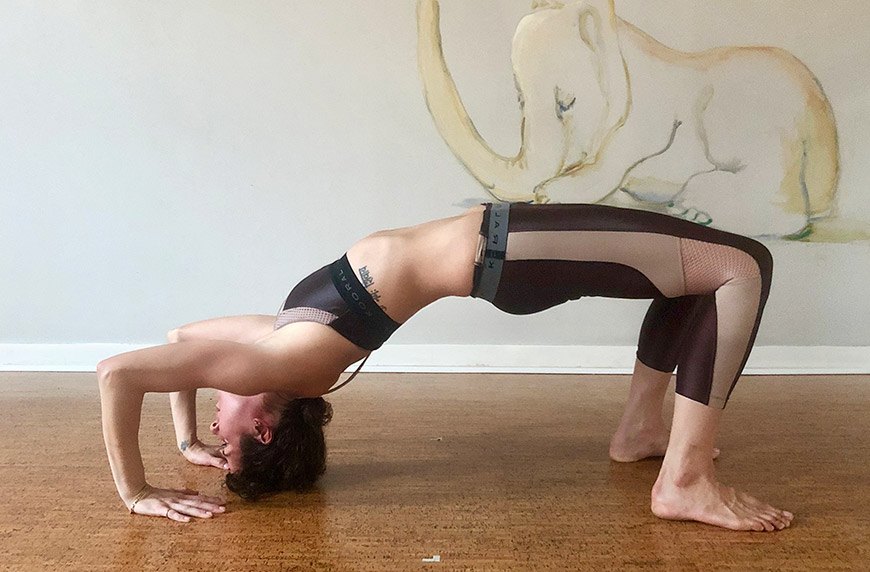
Step 2
Begin to engage your arms and legs by pressing your hands and your feet into the earth. Lift onto the crown of your head and pause to re-engage that hugging-in sensation through the midline.
Sidenote: "This step is debated among many yoga teachers, but I think that pausing on the crown of your head can be a good pit stop to re-organize your limbs," says Strimel, who explains that most advanced yogis go straight from step one to three. "There's a bit of concern about the [neck] here, which causes the debate. I think both ways work as long as you're in touch with the signals your body is sending you."
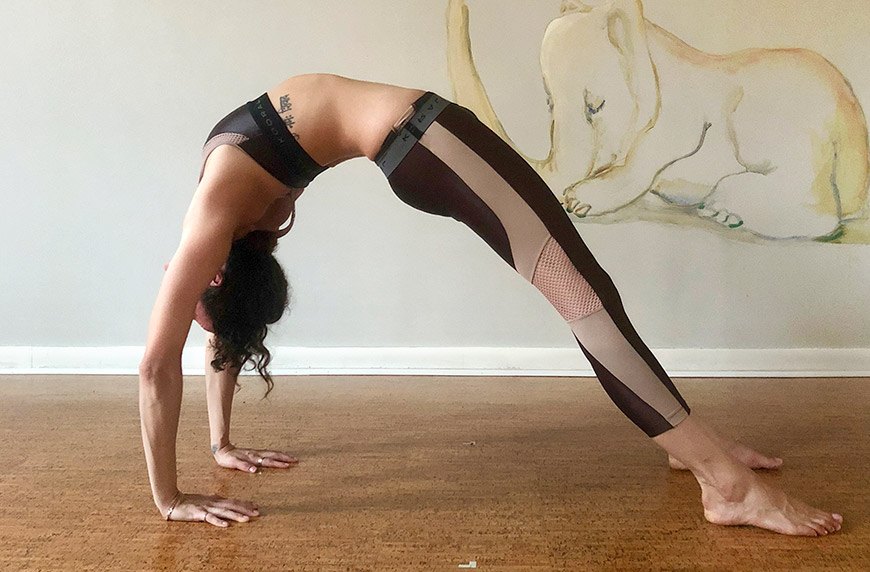
Step 3
Continue to wrap your arms and legs in as you press up all the way into the pose, straightening your limbs—but making sure you don't hyper-extend at the elbows or knees. Once you're there, begin to draw your heart forward between your arms and lengthen your pelvis forward and long. Start to experiment with how wide your legs are, perhaps narrowing your feet. You may also play with extending the legs longer. Allow your neck to be long and your drishti, or gaze, to be down the tip of your nose.
Lastly: "Exclaim 'Yipee!' very passionately as you are now in full wheel and reaping all of its beautiful benefits," says Strimel.
Another way to take your yoga sessions to the next level is by practicing according to your Ayurvedic constitution. Check out the best asanas for vata, pitta, and kapha doshas.
SaveSaveSaveSaveSaveSaveSaveSave
SaveSave
SaveSave
SaveSaveSaveSaveSaveSaveSaveSaveSaveSaveSaveSave
Loading More Posts...


