Our editors independently select these products. Making a purchase through our links may earn Well+Good a commission
Food photography tips from pros, because we’re all food influencers now
Healthy food chefs and photographers Candice Kumai and Liz Moody give expert food photography tips for upgrading your Instagram photos.
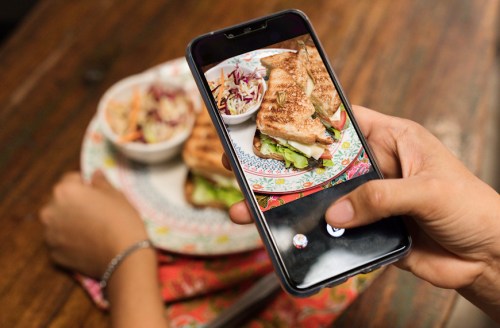
Before COVID-19, everyone had plenty to post on Instagram. Avocado toast brunches, candle lit yoga classes, outdoor soundbaths…chances are it was all part of your feed—maybe you were even the one posting. But now that we’re all doing our part to #flattenthecurve, no one is going out. What is everyone doing instead? Cooking.
If you spent two hours baking banana bread but didn’t post it on Instagram, did you even really make it? Social distancing has become the perfect excuse for finally getting around to making sourdough bread or busting out that pasta maker that’s been in the closet since your wedding. And it’s only natural to want to share your food creations with the world. After all, you have nothing else to post. (You know, until you’ve mastered that TikTok dance.)
COVID-19 has turned us all into healthy food influencers, posting photos of our dinners made with pantry staples and whipped matcha lattes. Candice Kumai and Liz Moody are both actual healthy food influencers; they both have stunning cookbooks to prove it. But they also post food pics on their own IG feeds on the fly, too. Even their spontaneous photos look super profesh, and it’s because they have a few tricks up their sleeves. Here, Kumai and Moody share their secret food photography tips, all easy ways to turn a casual healthy food pic into an all-out masterpiece.
Set the stage
Before you even grab your phone and start taking pics, both Kumai and Moody say you have to set the stage, so to speak. In terms of background, both favor a modern marble tabletop, but you don’t have to max out your credit card at West Elm to get the affect. “I shoot on marble contact paper which I bought on Amazon for $7,” Moody says. “I know a lot of other food bloggers use it too. You can literally just roll it out on any surface and then put it away when you’re done.”
Then there’s the plates or bowls to consider. “Typically, the cleaner the better,” Kumai says, saying that plain white is her favorite because it keeps the focus on the food. But she offers up one caveat: If the recipe you’re following has a story to it, like if it’s your grandma’s chicken noodle soup, for example, Kumai says the dishware can add to the storytelling. “If you have dishes that were your mom’s or grandma’s, that can look really beautiful. And vintage pottery and dishware can be beautiful too,” she says. It all depends on the vibe you’re going for.
Whatever dishes you use though, Kumai says not to spend too long deciding; with some foods, you don’t have very long to get the perfect shot. “The texture of food can change quickly, especially if it’s something like a souffle or ice-cream,” she says. Besides, you want to, you know, eat what you made, right?
Getting the perfect shot
The scene is set. Now let’s talk lighting. Both Kumai and Moody say that there is no filter that beats natural light. “God’s lighting is the best,” Kumai says. “Go right up against your window. Even being two feet away won’t be as good,” Moody instructs. She also adds that direct sunlight isn’t best, so try to get that sun steaming in at an angle, if you can. Oh and cloudy days: they’re perfect for snapping food pics.
When natural light isn’t an option, Moody has a go-to app that she relies on: Lightroom. “It’s a free app you can download on your phone and it lets you adjust the colors, exposure, and shadows,” she says. Moody has a couple favorite settings in Lightroom, namely the “de-haze” and “sharpen” features.
In terms of how to shoot your food, Kumai is typically a fan of the uber-popular overhead shot, but she says there are some foods that look better shot from the front, at an angle. “A big stack of pancakes looks really great shot from the side,” she says. “Stacked food is best at an angle. So is grilled cheese.” She says to think about what you find most visually appealing about the food you just made and go all in on it.
If you want to get more serious about about your food photography, Kumai highly suggests investing in a camera, which will take better quality photos than your phone. “It’s nice to invest in a Sony Alpha7 or Canon 5, if you are able to,” she says of her go-tos, and adding that she shoots her food photos using a 50 millimeter lens.
At the very least, cooking for yourself and taking photos of your meals can provide a simple joy, and who doesn’t need more simple joys in their life right now? While you may not be able to share a meal with your friends right now, you can still share a photo. It’s still a way to feel the love—even if that love comes in the form of a double tap.
Sign Up for Our Daily Newsletter
Get all the latest in wellness, trends, food, fitness, beauty, and more delivered right to your inbox.
Got it, you've been added to our email list.
