How often should you clean your fridge? Less than you think—unless your answer is never
Your icebox doesn't need the daily, weekly, or bi-weekly clean other parts of your kitchen might. Experts say you should clean yours every one to four months depending on these certain factors. And when you do, here's the easy, eight-step way to do it.

True confession: The guy I’m newly dating recently opened my fridge and let out an audible gasp of horror. It was well-earned, too. Embarrassingly, I can’t remember the last time I scrubbed its insides, and I’m not exactly the girl who wipes up after every drip (or, any drip). In other words, if you’re looking to avoid the next superbug, I’d steer clear of my kitchen.
Obviously, my icebox needs some attention, but if you’re less of a slob, you may be wondering what the general rule is for fridge-cleaning frequency. According to Mary K. Bolger, Whirlpool Corporation’s Institute of Home Science refrigeration expert, you should be cleaning the interior monthly, changing the water filter and air filter twice a year (if your model has them), and cleaning the condenser coils once a year (more on that in a bit).
If there’s no way you’re going to scrub your fridge once a month, worry not. Melissa Maker, founder of Clean My Space, offers more specific (and slightly more lax) advice around regular cleanings. She says that if you stay on top of small spills, drips, etc.—especially the sticky stuff like maple syrup or even ketchup (and P.S. the USDA recommends cleaning such spills immediately)—you’ll need to clean your fridge less frequently than someone (it me) who does not. “[For] the average home—let’s call it two adults—I would say you need to clean your fridge out properly every three to four months,” she says. “If you find that it’s smelly or things are coming out of it not looking like they should—so if something is fuzzy or liquified—you may want to clean more frequently.”
Not sure how to go about a proper scrub? She’s got tips for that, too. Below, find a step-by-step guide to making your icebox sparkle.

How to clean your fridge in 8 easy steps
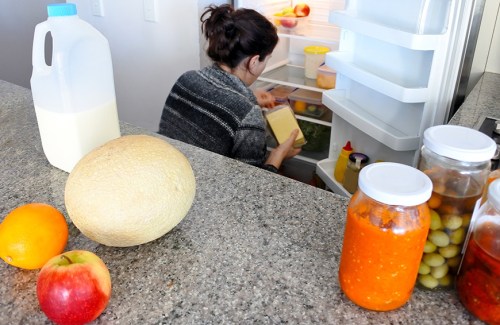
Step 1: Remove everything
The first thing you want to do—even if it seems overwhelming, she says—is take everything out of your fridge. “If you’re low on counter space, you can throw a big towel down on the floor and use that as a temporary way station for all of the things you’re pulling out,” she suggests. One note on this: Don’t get distracted in the process, as according to Foodsafety.gov, perishable food shouldn’t be left out for more than two hours.
Step 2: Evaluate the goods
Next, says Maker, you’re going to want to look at everything you pull out of the fridge and ask yourself, “Have I used this? Is it still good? Am I going to use this?” If the answer is “no” to any or all of the above, get rid of the item. “You really have to stay on top of what’s happening in the fridge, and that’s why these semi frequent cleans are great,” she says. Maker also recommends taking inventory before heading to the grocery store—every time. “Before you fill your fridge up with fresh food, go through and pull out anything that is toward or at the end of its useful life,” she says, noting that veggie odds and ends can be used to make stir fry in order to reduce waste.
Step 3: Soak your shelves
Once you have everything out of the fridge, Maker recommends removing its shelves. “You can spray them with a simple solution consisting of a teaspoon of dish soap combined with two cups of water,” she says. “If there’s something really goop-y or stuck on, you can sprinkle some baking soda onto the area and just let it sit.” Once you’ve sprayed the shelves down—and Maker says to be very liberal, so they get very wet—just let them “hang out.” You’ll be back to them in a bit.
Step 4: Clean the cavity
Next, Maker says to spray the inside of your fridge cavity with the same dish soap-based cleaner you used on the shelves. “If you notice anything sticky, you can likewise just apply a bit of baking soda and then scrub it off with a non-scratchy sponge,” she says. Once this is done—you’ve sprayed the whole interior down and gotten rid of any stain spots—wipe the area with a clean, wet cloth. “That will effectively rinse away anything that you don’t want to be left there,” she says.
Step 5: Make your salad drawer less disgusting
Now, back to those shelves you left soaking—you’re going to want to wipe them down the same way you just did the fridge. Don’t forget to include the crisper basket in that process, either—apparently, this is the dirtiest space in your entire refridgerator. Then, reassemble it all back into the fridge.
Step 6: Add a box of baking soda
Before you return any food back to those sparkling shelves, Maker advises opening a fresh box of baking soda and putting that somewhere in your fridge. “The baking soda acts a neutralizer, so it absorbs odors and flavors,” Maker explains. “It helps your fridge not smell nasty and your food not taste like other food.” It only works, however, if you replace it every three months. (Oops!) “The bonus is when you’re done with that box of baking soda, you can use it for cleaning,” Maker adds.
Step 7: Wipe down your condiments, etc. and reorganize inside the fridge
You’re not done just yet. Before putting your condiments, etc. back into the fridge, you’re going to want to add a little dish soap to a damp cloth and use it to wipe everything down first. Maker also advises using this time to reorganize the fridge contents, prioritizing items with quickly-approaching expiration dates toward the front of the space.
Step 8: Once a year, clean your condenser coil
According to Bolger, dirt, dust, grease, and pet hair (ew!) can collect on your refrigerator condenser coils. “Cleaning these coils will help your refrigerator run more efficiently,” she says. To do so, she advises unplugging your unit and removing the base grill from the bottom of the front of the unit. Then, use the soft brush attachment on your vacuum cleaner to clean its surface.
My fridge is probably the germiest spot in my home, but here are six others you should probably be more worried about. Plus, get all the deets on how kitchens are *finally* getting the wellness makeover of your dreams.


