Our editors independently select these products. Making a purchase through our links may earn Well+Good a commission
How to can food yourself and enjoy homemade jams, pickles, and preserves all year round
Healthy eating experts and canning pros give a step-by-step guide for how to can food, detailing both water bath canning and pressure canning.
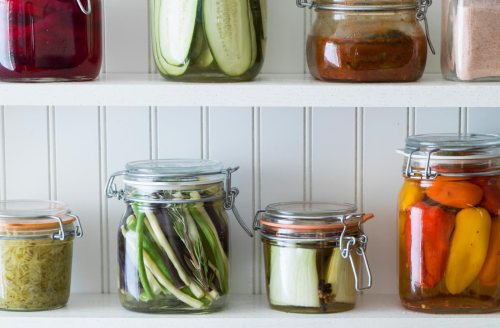
Pre-pandemic (remember the days?), spontaneous trips to the grocery store were taken for granted. Out of oat milk or have a craving for plant-based queso? No prob. But now, grocery shopping is an Event, planned around going during non-peak hours and dressing appropriately (aka wearing a mask). Even when you get to the store, there’s not always a guarantee the shelves will be stocked with everything on your list.
It’s no wonder we’re collectively having a back-to-basics moment, with increased interest in growing and preserving your own healthy foods at home. (Anyone else start a countertop garden the last few months?) “My mother grew a big garden and canned some of her harvest when I was growing up, but I started canning in earnest about 10 years ago,” says Jenny McGruther, food blogger and author of The Nourished Cookbook ($27.99). “My husband and I were deeply involved in our local food scene, and we began canning because it helped us eat locally and affordably year-round.”
Angi Schneider, author of the newly released book The Ultimate Guide to Preserving Vegetables ($25), says she too started canning as a way to save money. “I started canning over 20 years ago when we were trying to feed our growing family quality food on a tight budget,” she says. “We started foraging berries and growing a garden. Canning was the natural next step.” Schneider says the benefits of canning are that it allows you to preserve seasonal produce to enjoy all year long.
Of course if you’ve never done it before, canning can be a little intimidating. Here, McGruther and Schneider break down the process step-by-step, detailing everything you need and tips for doing it safely. Keep reading for everything you need to know when it comes to how to can food.
What you need to get started
Getting started with canning produce does have some costs attached to it upfront. But all the tools you need can be reused repeatedly, so it’s just a one-time cost (with the exception of the lids, which should be replaced each time). Here’s a list of what you need, according to the experts:
1. Canning jars and lids ($38.17 for a pack of 24)
This is what you’ll store your produce in.
2. jar lifter ($7.98)
A jar lifter is used to safely remove the cans from boiling water. (More on that in a sec!)
3. bubble remover ($7.09)
This tool is used to remove air bubbles before sealing the jars.
4. CANNING FUNNEL ($6.37)
A canning funnel is used to fill the jars with your produce. They’re helpful because they prevent anything from splitting, and are also the most sterile way to can since it keeps you from directly touching the produce with your hands.
5. WATER BATH CANNER ($51) or PRESSURE CANNER ($97.98)
The type of canner you go with depends on the canning method you prefer. Not sure which way to go? Keep reading to learn the difference between the two methods, and how to do each one.
How to can using the water bath method
“For beginners, water bath canning is a great way to start,” McGruther says. “Water bath canning uses boiling water to sterilize jars of food, and preserve them for the long term. This method works for high-acid foods like fruits, jams, jellies, and pickles.”
Schneider adds that water bath canning is a good method for high-acid foods with a pH of 4.6 or lower. (Most fruits, including apples, blueberries, blackberries, and peaches, fit the bill.) “Low-acid produce, with a pH of higher than 4.6, must be processed in a pressure canner to kill any botulism spores that might be present,” she says. “Botulism can survive in temperatures up to 248°F but cannot live in a high-acid environment, which is why high-acid foods can be processed in a water bath canner. Low-acid foods are vegetables, legumes, and meat.”
Schneider adds that if you’re pickling vegetables in a vinegar brine, this raises their acidity, which means you can then use the water bath canning method. “The vinegar acidifies the vegetables enough to make them safe for water bath canning,” she says. In order to make sure you’re being safe, she says it’s important to follow tested recipes when pickling vegetables to ensure that you’re doing it safely and adding the right amount of acid.
Here, the experts gives steps on how to do water bath canning at home:
1. Wash your jars with hot, soapy water. The jars must be kept hot while the produce is being prepared.
2. Fill your canner with water, two-thirds of the way full, and bring it to boil.
3. Boil the produce you want to preserve on the stove. Once the water is boiling, use the canning funnel to fill the jars, leaving one-fourth inch of space at the top. Seal the lids using the bubble remover.
4. Nestle the filled and sealed jars into the canner’s rack and lower them in. The boiling water should cover your jars. Cover the pot, and then set a timer (the time will vary depending on the recipe you’re following).
5. When the timer’s finished, carefully lift the rack out and transfer the jars to a towel on your countertop using tongs to prevent burns. Let the jars sit for 12 hours and then check the seals, to make sure it was sealed properly. If any jar did not seal properly, put it in the refrigerator to use first. If it did, it’s ready for your pantry and can safely be stored there for up to one year.
How to can using the pressure canning method
As mentioned, pressure canning is best for low-acidic produce, legumes, and meat. Here’s the step-by-step process, according to the experts:
1. Prepare the pressure canner, based on its instructions. (Different brands work a bit differently.)
2. Wash the jars and then fill them while hot, using the same method as with the water canning method: Boil the produce you want to preserve on the stove. Once the water is boiling, use the canning funnel to fill the jars, leaving one-fourth inch of space at the top. Seal the lids, using the bubble remover.
3. Put the jars into the pressure canner. Use the manufacturer’s instructions to seal, vent, and pressurize the canner. Once the canner reaches the correct pressure, set a timer for the recommended processing time.
4. When the timer goes off, turn off the heat and let the canner depressurize naturally, again referring to the manufacturer’s instructions for depressurizing and removing the jars from the canner.
5. Allow the jars to cool on the counter for at least 12 hours before checking the seals. If any jar did not seal properly, put it in the refrigerator to use first. The other jars can be wiped down and stored in the pantry. The canned produce will be good for up to a year.
In terms of safety, the experts have a few words of advice to keep in mind. Schneider reiterates that the water bath method should only be used for foods with a pH of 4.6 or lower. She also says it’s important to follow tested recipes or recipes that have been adapted using safe recommendations. “The National Center for Home Food Preservation is the USDA’s website for up-to-date canning recommendations,” she says. McGruther adds that while you can reuse the jars, you’ll want to replace the lids each time.
But with that in mind, you’re ready to start your canning adventures. “While canning food at home may not be the necessity it once was, it is a fantastic way to begin to take back control of your food supply and truly be responsible for what your family eats,” Schneider says. “Start small with learning how to make jam or pickles, which are the easiest and safest things to can at home. As your confidence grows move on to pressure canning vegetables and soups to have on hand for busy weeknight meals. In time, you’ll have a pantry filled with home-canned goodness.”
Sign Up for Our Daily Newsletter
Get all the latest in wellness, trends, food, fitness, beauty, and more delivered right to your inbox.
Got it, you've been added to our email list.

