How To Use a Rowing Machine Correctly—Because We’re Definitely All Making the Same Mistake
It's not easy to learn how to use a rowing machine properly, but it's worth the effort. Here's what a rowing coach wants you to know.
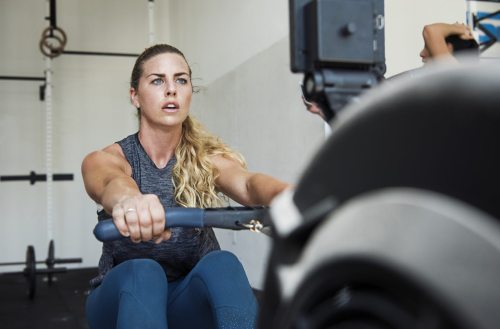
Almost all novice rowers make the same mistake within seconds of strapping into a rowing ergometer, says world-class rower Libby Peters, the former associate head coach of the University of Pennsylvania women’s rowing team. As a member of the U.S. National Team, Peters won a bronze medal at the 2008 World Rowing Championships. Needless to say she knows how to use a rowing machine properly.
It’s not entirely intuitive, but with practice, rowing becomes as natural as, say, breathing. And now that it’s no longer a sport reserved for Ivy League athletes, rowing machines have finally found their way into fitness studios throughout the country. From New York’s City Row to high-tech at-home equipment, strokes are becoming as ubiquitous as cycling or running. But perhaps rowing’s greatest appeal is the uniquely low-impact efficiency of the movement.
While providing a great full-body workout, a rower is designed primarily to target your legs—but the most common mistake is that too many people task their arms with all the work, pulling with all their might, says Peters. She recommends rethinking the way you approach the exercise.
“The thing to remember about rowing is, it’s basically like you’re lifting like a heavy load,” says Peters. “When you’re in a boat, the load is you and the boat itself; when you’re on the erg, the load is the resistance being created by the machine.” (I don’t know about you, but this was an “aha!” moment for me when I heard it.)
Below, Peters explains how to fix your rowing form. With practice, the rowing machine promises to become one of your favorite pieces of equipment.
How to use a rowing machine with tips from a world-class rowing coach
Before you sit down on the sliding seat, make sure the adjust rowing machine’s damper setting. This mechanism, located on the side of the machine, determines the resistance level. Set it to level three, four, or five. Cruising at these lower speeds will keep you from hurting yourself when you’re just getting your sea (land?) legs, according to Peters.
- 1.The Finish: To start, strap in your feet, straighten your legs, and clutch the handle so it falls right at your lower ribs (your palms are facing down). Your upper body will lean slightly back at an 11 o’clock position. This position is called “the finish.”
- 2.The Catch: To move safely into the catch, slide your body forward until your shins are parallel and your knees are directly over your ankles. Your chest will be touching, or nearly touching, your thighs at the 1 o’clock position. Make sure to keep your upper body from rolling forward.
- 3.The Drive: Pay attention! This is the trickiest part. Start by pushing your feet forward to straighten your legs. Once they’re completely flat, pull your body back from the 1 o’clock position to the 11 o’clock position. Finish by pulling the handle into your body while keeping your core tight.
You did it! Peters warns that the whole movement pattern will feel clunky and mechanical at first. Once your body familiarizes itself with the finish, catch, and drive, you can close your eyes and imagine you’re skimming across a placid lake, rather than sweating buckets at the gym.
Try out your new form with a 12-minute rowing workout
“I always recommend starting with intervals,” says Peters. For a quick-hit cardio session, alternate every 60 seconds between slow strokes that focus on strength and proper form (shoot for 16 to 18 strokes per minute), and strokes that are more casual as your active recovery. Go back and forth between the two for 10 to 12 minutes.
“I really like interval workouts for young or new athletes,” she says. “I think you get more out of it by doing higher quality with shorter time or shorter distance.”
Sign Up for Our Daily Newsletter
Get all the latest in wellness, trends, food, fitness, beauty, and more delivered right to your inbox.
Got it, you've been added to our email list.

