Our editors independently select these products. Making a purchase through our links may earn Well+Good a commission
Oven Cleaning Hacks That Truly Work, According to an Expert
An eco-minded cleaning expert shares his best oven and stove cleaning hacks for an efficient and safe clean, inside and out.

Although we may not always feel like full-fledged adults (and hey, many people never do!), it helps to have a well-stocked library of adulting techniques at your disposal. Think: Understanding all the different types of health insurance (oof, deductibles!), being able to do your taxes by yourself, and knowing how to clean everything in your home (because no, it’s not always apparent).
Experts in This Article
co-founder and CEO at Cleancult
When homing in on the latter, we came across a topic that seems to be widely misunderstood: how to clean your oven. Where some ovens come with cleaning programs, others are so old-school that you have to DIY. Whatever the case may be, we chatted with Cleancult’s co-founder and CEO, Ryan Lupberger, to learn his best oven (and stovetop!) cleaning hacks, once and for all.
A cleaning expert’s top oven-cleaning hacks
According to Lupberger, one of his hottest oven-cleaning hacks has to do with nixing pesky burn spots. You know the ones: Your pizza’s cheese and sauce bubbles over and drips onto the bottom of your oven. What do you do?
For starters, he says to soak the burnt spots with a sponge full of all-purpose cleaner. Don’t rush the process, though. For best results, he says you should leave the soaked sponge on the spot for at least 20 minutes to fully loosen the built-up grime. Once time’s up, try to wipe away the spot. If it’s still hanging on, Lupberger says to use a strong sponge scrubber (with a dot of citrus dish soap) to help loosen its grip.
If you find the idea of putting soap and all-purpose cleaner in your oven to be questionable, Lupberger is here with reassurance. “Citric acid helps remove burn spots,” he explains. Still, if you’d prefer not to put soap and cleaner in your oven—a place that comes in direct contact with your food—one of his other oven-cleaning hacks is simply to use a spray bottle filled with equal parts water and vinegar. (Consider adding in a teaspoon of baking soda for even more grime-busting action.)
If drips on the bottom of your oven aren’t your biggest concern but your racks are, the cleaning process is simple. “For oven racks, we recommend people fill up a bathtub of water, add about 16 ounces of dish soap, and let them sit overnight,” Lupberger says. “In the morning, the racks come out looking brand new and sparkling clean. Just wash off the soap, and you’re done.”
Lastly, when tending to the outside of your oven (aka the door), it’s as simple as wiping it down with a cloth wet with lukewarm water. If the window is particularly grungy or streaked, you can use a spritz of Windex on a paper towel.
How to clean a stovetop
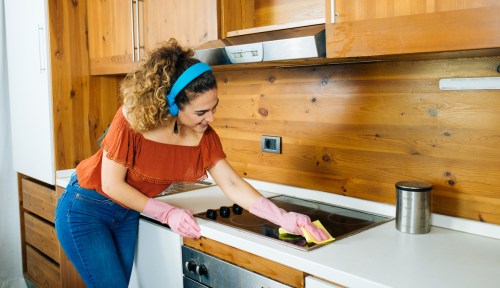
Tidying up a stovetop is much like cleaning the oven door—a damp cloth typically does the trick. That said, if your stove is gunked up with stubborn stains, Lupberger says that a dish soap containing citric acid will help cut through the grease and grime, while naturally disinfecting the area, too.
But remember: Not all stove tops are created equal. When working with gas stove tops, you can approach the burner cages much like you would oven racks. Simply remove them from the stove and soak them in soapy water until they come out looking like new. Be sure to wipe them down with a damp cloth to remove all traces of soap before replacing them on the stovetop.
Electric cooktops require a bit more TLC. Since they’re essentially glass, you don’t want to risk scratching them with a scrubby sponge. Because of this, scratch-free sponges exist, like Scotch-Brite Glass Cooktop Pads ($7). You can proceed with the same all-purpose cleaner or reach for a stove-specific cleaning paste or spray, like Weiman’s Cook Top Daily Cleaner ($7). Simply spritz it on, use a non-scrub sponge to wipe it off, and buff it out with a paper towel for a glistening, streak-free shine.
How to clean behind (and under) your oven
One of Lupberger’s most important oven-cleaning hacks is not to neglect the space around your oven. Cleaning behind and under your oven is generally an easier process than cleaning within it, but it does require a bit more muscle to achieve. That’s because you often have to move your oven in order to reach any crumbs (or, in the case of my nephews, a million spilled sprinkles) that make their way into the hard-to-reach areas surrounding the kitchen appliance.
When moving your oven, it’s important to go slowly and be aware of the foil duct stretching out the back, as you don’t want to accidentally detach it. Also, keep in mind that ovens are heavy, so it may be a two-person job. Of course, if the idea of moving a bulky appliance feels like too much of a burden, you can always try extending a Swiffer Dusters Heavy Duty Extender ($21) behind or beneath your oven, as the brush heads are flat and the duster itself squishes down. Alternatively, you can use the crevice tool attached to your vacuum cleaner to powerfully suck up any debris.
A note on cleaning-product safety
Since ovens and stovetops are so closely linked with the foods that we consume—and cleaning them comes in contact with our hands—it’s worthwhile to be mindful of the products you use.
“Conventional cleaning products don’t list their ingredients on the labels, so when using these types of cleaners we recommend using gloves, and in some cases even a mask,” Lupberger says. Or, you can use a more natural cleaning brand, like Mrs. Meyer’s, Blueland, or Cleancult.
Oh hi! You look like someone who loves free workouts, discounts for cutting-edge wellness brands, and exclusive Well+Good content. Sign up for Well+, our online community of wellness insiders, and unlock your rewards instantly.
Sign Up for Our Daily Newsletter
Get all the latest in wellness, trends, food, fitness, beauty, and more delivered right to your inbox.
Got it, you've been added to our email list.


