Why Your Wrists Might Hurt During Yoga, and 5 Simple Ways To Relieve the Pain
Learn from a yoga instructor what to do if you're feeling wrist pain in yoga class, from warmups to gentler modifications.
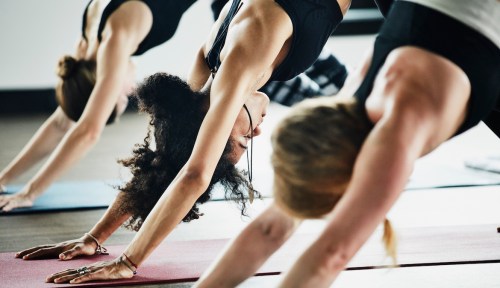
I’m in my favorite yoga class on Friday night, but I’m mentally begging the instructor to lead us out of downward dog. I feel an aching pain in the top of my wrists. We finally change poses—but to plank and then upward dog, both of which also put a lot of weight on my wrists. I reluctantly sit on my heels and stretch my wrists to try to get the discomfort to go away.
Experts in This Article
Randi Sprintis, MS, is a yoga instructor and the Mental Health Technology Editor for Choosing Therapy.
When I overhear the teacher telling another student that our wrists will get stronger as we practice, it’s a relief for two reasons: 1. I’m not the only one who’s struggling with wrist pain in yoga, and 2. There’s hope that it’ll get better.
According to experts, it turns out I’m far from alone. “Wrist pain in yoga is incredibly common, especially when you’re first building your practice,” says Randi Sprintis, MS, an Ashtanga yoga instructor. “Several yoga poses place weight over the wrists, which can cause soreness or discomfort for anyone who’s not typically using the wrists in other exercises or sports, like tennis or golf.” She adds other contributing factors could be a lack of flexibility, lack of strength, and misalignment (all of which are totally normal, and nothing to be ashamed of).
Yet the aching I feel tempts me to just skip practice the next week—but that’s not really what I want to do long-term. I wonder if there’s a way to either proactively or reactively address my wrist pain so it won’t get in the way so much. Thankfully, yoga experts say there are some ways to do this. (Phew.)
Stretch and warm up your wrists beforehand
As you sit on your mat and wait for class to begin, you can work on preventing potential wrist pain in yoga. “Giving your wrists a quick stretch before a practice can help alleviate soreness and prevent injury,” Sprintis explains.
Not quite sure how to do this in an effective way? She provides an example stretch: Get into tabletop position (aka all fours) and place your hands directly under your shoulders. Then, gently rotate your hands until your fingers are pointing toward your knees. After holding for five breaths, move back to the original position.
Sprintis also suggests warming up your wrists before your flow by circling them in both directions.
Check your alignment
The placement of each body part in a pose is more crucial than I realized—and not only for the sake of executing the pose correctly (which can be tricky!). According to Sprintis, proper alignment “allows the body to create a solid foundation and reduces the risk of injury.”
While doing poses such as the plank or chaturanga dandasana (the low plank), she says, make sure your hands are directly under your shoulders. Additionally, you can experiment with what is (and isn’t) comfortable by going into a tabletop pose and inching your hands in, out, forward, and backward until your wrists feel the best.
“If your alignment is off, even by a little, it can strain the wrists,” she adds.
A common misalignment is placing your hands too far outside of your shoulders. “Many beginners may try this because it can create this false sense that you’re forming a wider and more stable base for holding your upper body weight,” Sprintis explains. “However, when we plant the hands too far outside of the shoulders, we’re putting too much pressure on some of the more delicate areas of the wrist, leading to more pain.”
Spread your fingers
Believe it or not, this simple hack is effective, too. Spreading out your fingers and pressing into them helps distribute your weight. “Check the four corners of the hand—the index finger, heel of the hand, pinky finger, and mound of the thumb—and make sure the fingers are spread evenly to create a solid base, so you’re not putting too much pressure on the heel of the palm,” Sprintis says. Press your weight through all four corners, so you’re not sinking into your wrist (an all-too-common habit).
Be mindful of weight distribution
On that same note, you may want to adjust your body so your weight is more evenly spread out. Maybe you want to rest your knees on the ground during plank position, or push backwards a bit in downward dog so you have more weight in your feet than in your hands.
Also, when trying poses that put your weight all on your hands—such as a handstand or crow pose—get into the position slowly, Sprintis encourages. Overall, be gentle with yourself, take breaks, and switch things up if you need to.
Give yourself permission to skip (or change) poses
What’s most important to a yoga practice (or any type of activity) is listening to your body. “If you’re frequently feeling pain in your wrists in a certain posture, skip it!” Sprintis encourages. “Give your body time to heal and allow yourself to explore different modifications that might relieve any tenderness.”
This might look like moving into child’s pose or another gentle yoga pose you like, using a foam block, taking a break to stretch your wrists, or whatever else feels good to you. If you’re not sure what the best modification might be, ask a teacher for their personal recommendations before or after class.
BTW, according to Sprintis, regularly practicing downward dog and sun salutations at home can increase wrist strength, but being mindful of how you feel (and not pushing yourself too hard or too often) is paramount.
Remember: Your yoga practice is yours. Do what you need to do to get the most out of the class and feel comfortable. All bodies are different, and that’s perfectly okay.
Sign Up for Our Daily Newsletter
Get all the latest in wellness, trends, food, fitness, beauty, and more delivered right to your inbox.
Got it, you've been added to our email list.
