
When you're run down, sick, or just in need of some comfort, few things taste better than Vietnamese pho. It's one of those meals you might have delivered to your house with increasing frequency as temps turn cool, which means you may rarely think about all the care that goes into making this nutrient-dense soup, even as you're enjoying its myriad benefits and flavors.
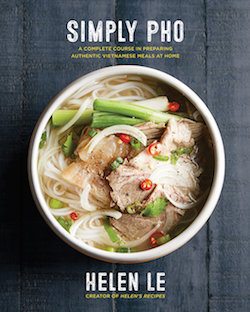
Making pho from scratch is no small feat, and doing so authentically is what Vietnam native Helen Le hopes to enable with her new cookbook, Simply Pho: A Complete Course in Preparing Authentic Vietnamese Meals at Home. Within the collection Le, creator of the popular YouTube channel Helen's Recipes, also demonstrates how to properly make many other Vietnamese favorites, including spring rolls and banh mi sandwiches. Still, few recipes require the level of detail Le reserves for her traditional pho.
"It is common in Vietnam for home cooks to use both beef and chicken in the same pot of pho. But many northern Vietnamese insist that pho bò (beef) and pho gà (chicken) are very different," she explains. "The chicken version of pho requires less ingredients—we use more bulb and roots, such as shallots, ginger, and coriander to bring an extra fresh and sweet aroma to the soup—and takes a lot less time to cook than the beef recipe, but it still tastes exquisite."
For this reason, Le's chicken version may be the best place to start if you're looking to start making your own pho. Below, she shares her mouthwatering recipe, insider tips for creating authentic textures and flavors, and insight into how Vietnamese people build their bowls of this now-ubiquitous soup.
Become a Vietnamese pho expert with Le's recipe and tips below.
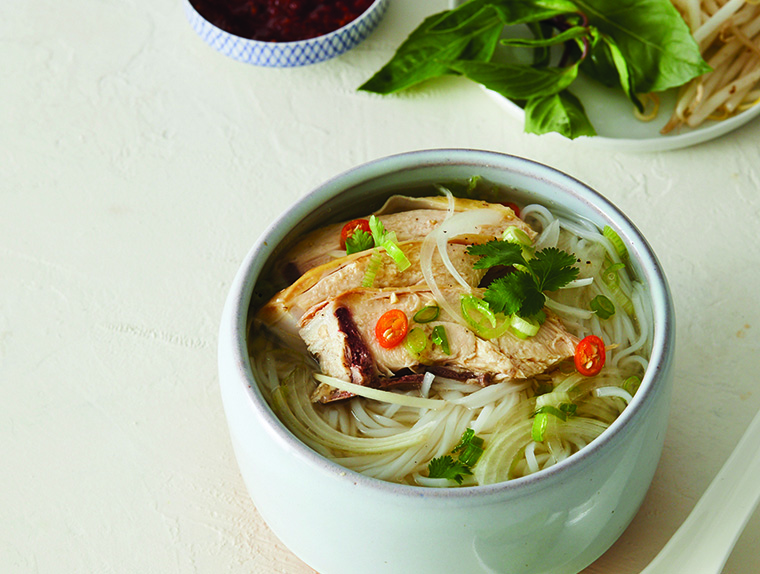
Pho noodle soup with chicken
Yield: 8-10 servings
Ingredients
Broth
1 Tbsp salt, plus more to taste
1 whole chicken (about 2.5 lb)
1 scallion
2 slices ginger (cut lengthwise into 1/8-inch-thick slices)
16 cups water
1 tsp chicken stock powder, plus more to taste (optional)
1 medium yellow onion, peeled
1 tsp sugar or rock sugar, plus more to taste (optional)
Pho aroma
1 thumb-size knob ginger (cut lengthwise into 1/8-inch-thick slices)
3 shallots
6 coriander roots
1 Tbsp coriander seeds
1 cinnamon stick (optional)
2 star anise (optional)
Pho bowl
3 1/3 lbs. fresh or cooked pho noodles
5 kaffir lime leaves, rolled and sliced into fine threads
1 medium yellow onion, sliced very thin, soaked in ice water for 15 minutes, and drained
3 to 5 scallions (green parts chopped; white parts kept whole, smashed, and blanched)
1/2 cup chopped cilantro
3 sprigs sawtooth herb
3 sprigs Asian basil
1 lb. bean sprouts, blanched
1 lime, cut into wedges
3 bird’s eye chili peppers, thinly sliced on the bias
Fish sauce, optional
Sriracha, optional
Hoisin, optional
Pickled garlic, optional
Chili jam, optional
1. To make the broth: Sprinkle some salt over the chicken and rub on the skin to remove some of the poultry smell. Rinse the chicken well under cold running water and drain. Insert the scallion and ginger into its cavity—this will enhance the flavor of the meat as it cooks. Add the chicken, water, one tablespoon salt, one tablespoon chicken stock powder, the onion, and one teaspoon sugar to a stockpot.
2. Bring to a boil, constantly skimming off the scum as soon as it rises to the top. When it boils, reduce the heat to low and cook, uncovered, until the chicken is tender. Occasionally skim off the scum. It might take 30 to 60 minutes depending on the kind of chicken you use. If the broth reduces, add hot water to compensate, making sure you always have the same amount as when you started.
3. To make the pho aroma: Heat the ginger, shallots, and coriander roots directly over an open flame on the stove until slightly charred on all sides. Peel the shallots, then rinse the shallots, ginger, and coriander under warm running water and scrape off the charred bits.
4. Toast the cinnamon stick, star anise, and coriander seeds in a pan over medium-low heat for one to two minutes, or until fragrant.
5. Place all of the pho aroma ingredients in a spice ball or large tea or spice bag, or wrap securely in a piece of cheesecloth. Add to the stockpot 30 minutes before serving, so the aroma stays fresh and tempting.
6. When you pierce the meat with a chopstick and see no pink water coming out, it is cooked. Remove the chicken from the stockpot and rinse well under cold running water to prevent the skin from darkening. Let cool, then debone. Slice the meat into bite-size pieces or shred roughly with your fingers. Return the bones to the stockpot and keep simmering for another 30 minutes. Try not to leave any meat on the bones as it may make the soup cloudy.
7. Season the broth to taste with salt, chicken stock powder, and sugar.
8. To assemble the pho bowls: Prepare the noodles following the package instructions, then rinse under cold water to stop the cooking process and remove the outside starch. Rinse again under hot water. This helps the noodles to dry faster and become fluffier, rather than sticking together and clumping.
9. Fill each serving bowl one-third full with noodles (about a handful of noodles). Top the noodles with chicken, lime leaf threads, onion slices, chopped scallions and cilantro, and blanched scallions.
10. Serve with a platter of the fresh herbs, blanched bean sprouts, lime wedges, and chili pepper slices, along with the fish sauce, hoisin sauce, sriracha, pickled garlic, and chili jam, if using these condiments.
Helpful pho cooking tips
Use as many bones as possible
There is nothing that can replace beef or chicken bones in making the broth for pho. For chicken pho, use whole chicken and if possible, extra chicken bones for a flavorful broth.
Broth should be clear, not cloudy
Cloudy broth is a total switch-off for pho. To get a clear broth, bones need to be parboiled for a good 10 minutes before using to make the stock. Dump out all the water and rinse the bones and the pot clean. Many people are afraid of losing the flavor in this step, but it is totally the other way around. During the first 10 minutes of boiling, the bones release all impurities and residues. The good essence in the bones only comes out after several hours of cooking. Parboiling helps cut down the skimming job tremendously.
Char the roots and toast the spices
This is a must-do to get that amazing aroma of pho broth. Normally we use on an open-flame stove and grill the onion, ginger, and shallots directly over the flame. When you take this step, your neighbors can already tell that you are making pho as they smell it! If you have an electric stove, line a piece of aluminum foil on top of the stove and place the roots on to grill. Another option is to broil in an oven at 430°F for 10 minutes.
Soak your noodles
You can soak the dried noodles in water for five minutes before boiling. This helps to reduce the cooking time. To help reduce clumping, place a bowl face down in a strainer and then drain the noodles over it. The round shape of the bowl prevents the noodles from forming into a solid block, making it easier to fluff and separate them.
How to assemble the perfect pho bowl
Your broth has simmered to perfection and your toppings and garnishes are prepped. Now what? It’s time to assemble the perfect bowl of pho. Once you are able to orchestrate the timing of everything to deliver a proper bowl that has all of the elements working together, these skills can then be transferred to any bowl that you build going forward. Follow these easy steps and you’ll have a bowl that will make you (and others) satisfied.
1. Bring a large saucepan filled with water to a boil.
2. Add the bean sprouts to the saucepan and blanch for three to five seconds.
3. Place a handful of noodles (fresh or cooked dried noodles) in a long-handle noodle strainer and blanch for five to ten seconds. When you lift up the strainer, let the hot water drip into the empty bowl. Give the bowl a swirl and pour out the hot water. The noodles and bowl are then warmed up, ready for the hot soup.
4. Place the warmed noodles in the bowl.
5. Add toppings such as sliced meat, chopped scallion, and sliced onion to the bowl.
6. Smash the white part of the scallion and blanch in the broth for two seconds. Ladle the scallion and hot soup over the noodles.
7. Add additional garnishes such as fresh herbs, blanched bean sprouts, sliced chili peppers, and a squeeze of lime.
If you're looking for a quicker soup fix, try these 30-minute superfood-centric recipes or, for another fall favorite, check out this Ayurveda-approved butternut squash recipe.
Loading More Posts...


